Migrate away from Wordpress to Hugo
TutorialsI’m no stranger to trying different CMS’s to see which one works best in terms of functionality, speed, and ease of SEO use. Over time - and many mistakes later - I’ve found that Hugo is the best for all three of those criteria. It’s very functional, fast to build, and easy to tweak for SEO. When you couple that together with the AWS backbone, you get a fast loading website where all the static builds happen automatically as soon as you update your Github repository. I’m writing this post on how I migrated away from WordPress to Hugo and used AWS Amplify to host my blog & website.

Introduction - WordPress Years
I started this blog on WordPress and then transferred it to Jekyll, then back to WordPress, and so on. You can read about my ‘passion’ for trying different CMS platforms by checking out my Blogging tag, but the reality is that WordPress is really easy for newbies to get up and running quickly. Some many popular blogs and sites run WordPress reliably and manage all their content with it. This is why it’s super sticky and it has some great themes to use out of the box. It’s when you want to ‘pimp’ or optimize your WordPress installation where you start running into problems.
For example, it relies on a database backend, and every time you visit the site it dynamically serves up the page. This is all good until you realize that you pay a loading time penalty for it. It can take a while. Plus you have to worry about malicious code injections from hackers that spam your site for the latest penis enhancement drug or Bitcoin scam. These code injections were the main impetus for me to start looking to migrate to a static blog generator.

If you want to do any SEO with WordPress you have to know PHP. I guess that’s ok but I never really cared much for PHP and found it boring. If you’re in that same boat, you’re going to have to use a plugin like Yoast. That’s great until you realize you have to start paying for it to get any benefit out of it. Do you need to modify your footer uniquely? You need to use a plugin. Want to back up your entire website? You have to use another plugin (and pay usually). Before you know it, you have like 10 or more plugins that are costing you money on top of what you pay for hosting.
All these plugins you need end up slowing your site down a lot too, which affects your SEO in a really big way. At the end of the day, you’re out money and have a slow site. Sure it might look pretty but if you want to grow organic traffic you have to focus on great and valuable content that loads fast, is SEO optimized, costs a hell of a lot less, and makes YOUR life easy.
Hugo and AWS Amplify (and Github)
I just settled on using Hugo to make running my blog easier. I no longer have to deal with plugins and paying for them. Of course, this forces me to be more hands-on with how I want to maximize SEO, how I want to leverage the Indie Web, and even Web Monetization. I also have to do manual backups now instead of using Vaultpress, but with Github, that’s become so easy that it happens on autopilot.
Writing content for a Hugo generated site is like a dream. The build times are fast, it has great image processing ability, and I can check out how my site will look before I deploy it if I run the development server. So I can do a lot of ‘offline things’ and know that once I push my update to my Github repo, AWS will rebuild and deploy my site automatically.
Of course, I have to pay for the usage of AWS Amplify but it will be A LOT cheaper than using the VPS at Dreamhost ($16/month). Sorry, Dreamhost but I think you’re not getting renewed this year.
Install Hugo
First things first. The move will take some time and if you follow these steps, should go off without a problem. However to prevent any mishaps we’re going to start with setting up a ‘staging’ environment. The goal is to build a clone of your existing WordPress site with Hugo and AWS Amplify so that when it’s all up and running you just ‘cut over’ to it.
Follow these steps:
- Download Hugo to your local machine and then read the quickstart introduction on how to build a site
- Grab a theme and install it for your Hugo installation
- Configure the config.toml file to your liking, especially on how your permalink structure is
- Startup your Hugo dev server using
hugo serverand then navigate to http://localhost:1313
You should see an empty local website running at that web address.
Sign up for an AWS account
The next step is easy, sign up for an AWS account here. We’ll get back to this later!
Sign up for a Github Account
This step is also easy, you’ll need to sign up for a Github account. You could use Gitlab, Bitbucket, and others, but I use Github for personal and work projects. It’s really easy to use for backing up your code and files BUT a little harder to use. You will need to get familiar with Git and I plan on writing a Git tutorial in the future.
How to Migrate Posts from WordPress to Hugo
Now we get into the fun part, the porting of your WordPress posts and pages to your local Hugo installation! First, you’ll need to extract your WordPress posts from your database. WordPress has a generic Export function but that’s not going to map the WordPress fields to the Hugo fields out of the box. What you will need is to use a Hugo Importer from Wordpres.
If the WordPress exporter doesn’t work, try using Wordpress to Jekyll exporter plugin AND then the Jekyll to Hugo importer.
Once you have your files, open one up to see if the YAML front end is correctly formatted. The YAML front end is where all the fine-grained control happens for your Hugo powered website. It’s where you can control all aspects of your SEO metadata as well as options for Table of Contents, Keywords, Categories, Slugs (permalinks), titles, drafts, aliases, etc.
It should look something like this:
---
title: Post Title
date: 2020-07-21
slug: post-title  << this builds to /content-directory-post-is-in/post-title/index.html
Keywords:
- Word1
- Word2
Tags:
- Word1
- Word2
---
The key is to have all your post metadata in between the ---’s at the top of the post. Note, this will be a markdown file with a .md extension. If you’re not familiar with markdown, you can read up on it here. It takes a moment to get used to markdown but once you do you never have to worry about formatting what you write in the ‘frontend’, markdown handles all that for you when your post gets translated into HTML.
Take all your exported posts and move them to your local instance of Hugo and put them in the /content/posts/ directory. Note, Hugo loves content organization and you should think about if you want to use content folders or not. You can read up on content organization here.
Hugo’s Development Server
Once the posts are in the /content/posts/ directory, you should see Hugo rebuilding the site in your terminal.
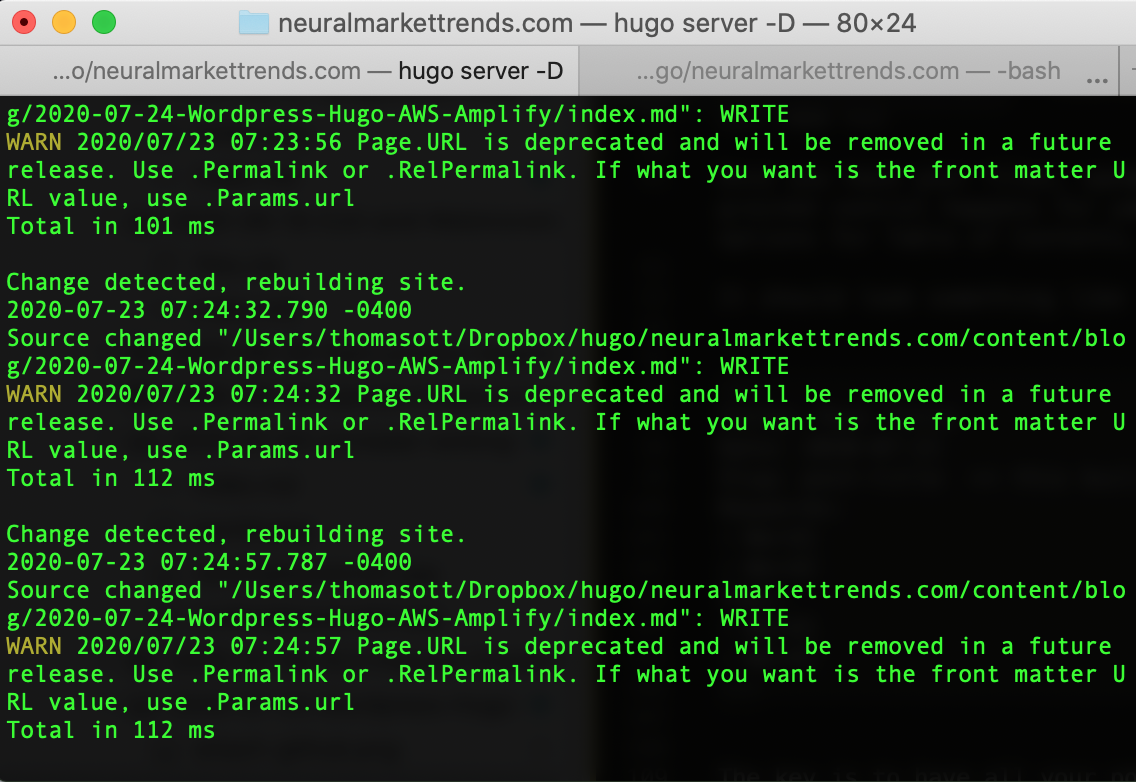
It will then generate the web site as a live preview. Any editing that’s saved will automatically rebuild and you can see your results in real-time. The great part about this the debugging part. Since Hugo is written in Go, it doesn’t ‘suffer fools’ and will break if it’s not perfect. This is good and bad, it’s good because it will tell you exactly what went wrong. It’s bad because you need to fix that mistake first before you can build your website in production.

I use this development server ALL the time. It lets me confirm if what I’m about to push to Github is what I want the world to see. This is where I test new partial templates, new shortcodes, and try new Hugo features. The development server will become your best friend and you can read up on some more of it’s functionality here.
Use Github to backup your site
I use Github for my code and project-related stuff. The concept of Git is just brilliant. It’s version control, process control, and backup all rolled into one. Granted, Github is an extra step in my regular workflow but it makes sure that my blog remains consistent over time. No weird hiccups unless I screw up! If I screw up, Git has a ‘rollback feature’ so I can undo my mistake quickly. The older I get the more I realize that Git is the true power here, especially if you’re in a heavy development environment.

You’re not going to take your entire local installation of Hugo plus your content and sync them with a Github repository. The terminology you will hear is that you’re going to ‘push your code to a remote repo.’ Github is the remote repository where you’re going to push your content and files too.
- First, you’re going to create local repository in Github Desktop
- You’re going to select the folder of your entire Hugo website, I name my folder
neuralmarkettrends.comand when I create a local repo, it automatically names the remote repo the same name. - Then you click ‘Publish’ and it will create the remote repo on Github. Note: your site is NOT backed up yet
- To back up the site in your remote repo you will need to create a commit message and then push it
- Once you push it to your Github repo, it should populate
Success!
How to Put Hugo into Production with AWS Amplify

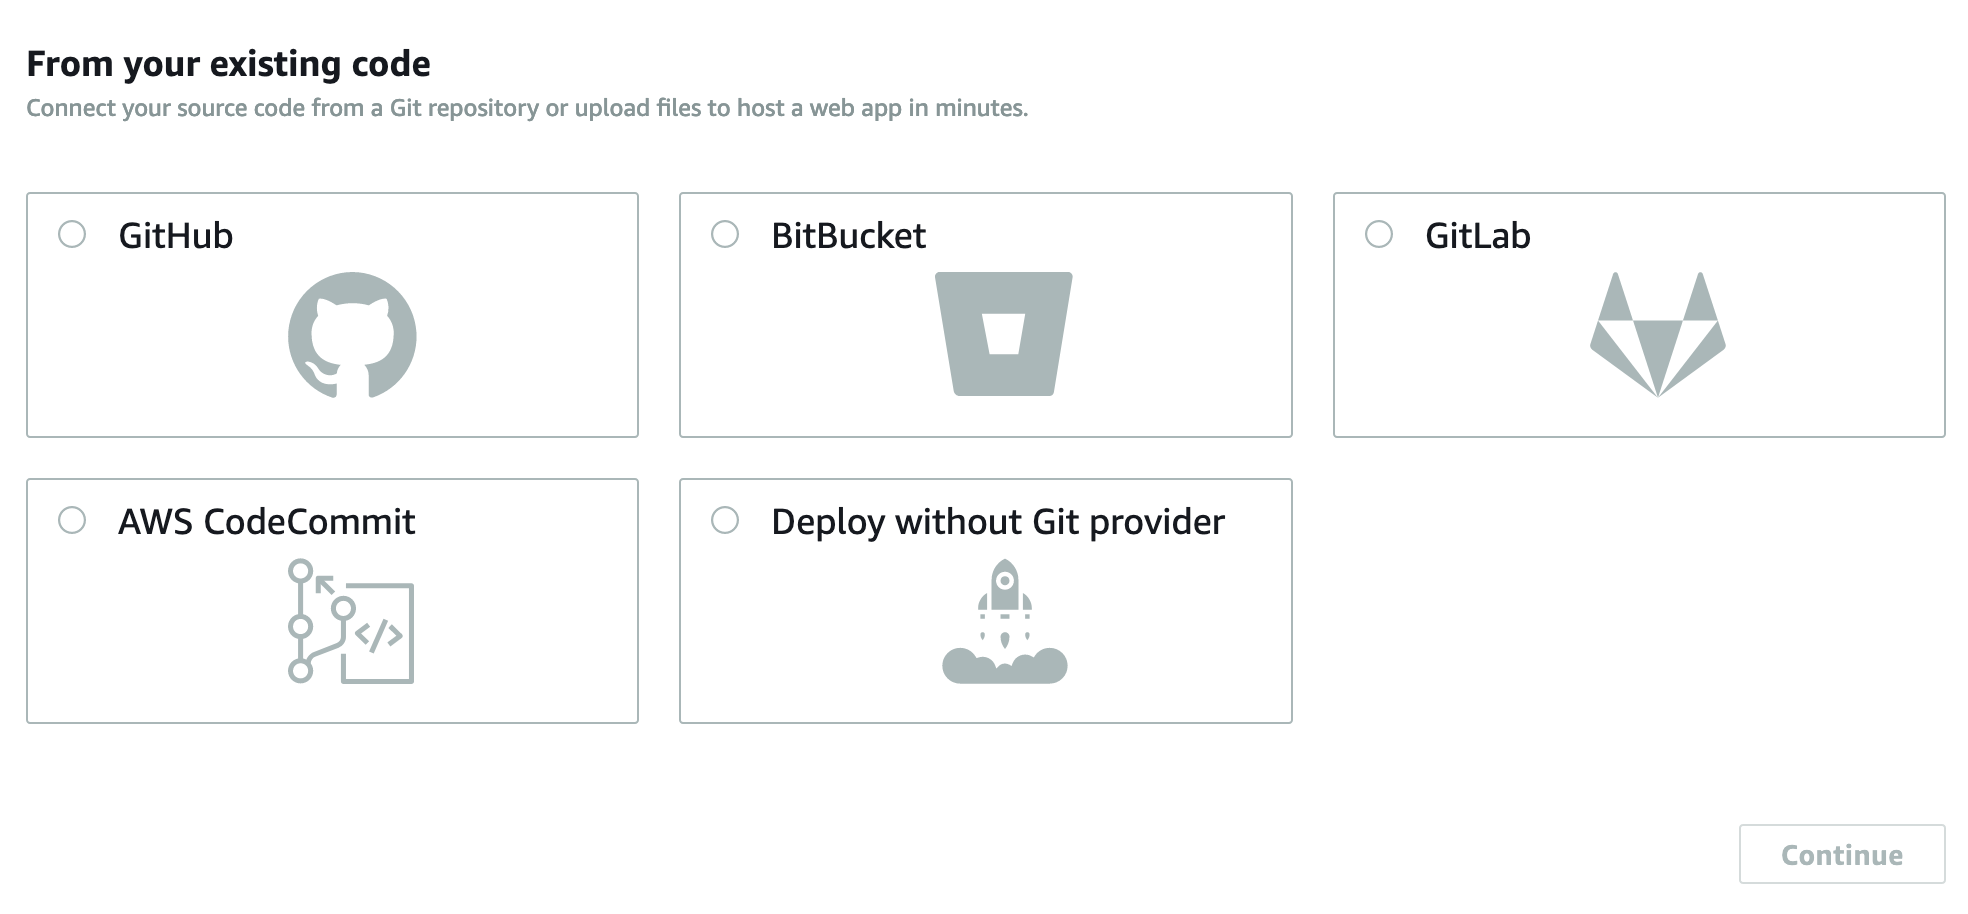
Once I had my blog backed up on Github I just followed the AWS Amplify instructions and generated the site successfully!
There was one big tweak that I made. AWS Amplify uses Hugo version 0.55 and that’s not compatible with many of the better themes. I had to update the version of Hugo the build was using to 0.74.2. It’s not hard, all I had to do was go the Build Settings and follow these instructions.
End Notes
I migrated to AWS Amplify for selfish reasons. I was about to renew my VPS at DreamHost for over $200 and thought that it was a tad bit high. Using AWS Amplify I expect to pay around $5 a month based on my past traffic, if it gets more active then I’ll pay more but that’s ok.
The added benefit to migrating here is that I get a wicked fast load time on the AWS backbone. I get like 1 second mobile device load times and millisecond desktop device load times. Wowsers!
But…
I realize that doing this migration is tricky for many non-hacker types of people, but you can learn if you want to. One of the things we didn’t go over in this post is using a custom domain with AWS Amplify. That was a bit tricking to set up and I’ll write another post on that shortly. Still, these steps should get you to a mirrored site of your WordPress blog on AWS Amplify.